Make/Integromat Overview
Make, formally called Integromat is a third-party service to integrate your data across applications and services. Here on in we will refer to it by Make/Integromat to avoid confusion.
You can create a scenario in Make/Integromat and connect your ScanOrders account to create automation across different platforms.
For example, you can set up a scenario to pull your Shopify orders into ScanOrders, ready to be scan picked.
This article will walk through linking your Shopify store to ScanOrders to automatically pull in orders
Getting started with Make/Integromat - Syncing orders from Shopify to ScanOrders
If you use Make/Integromat , you can create a scenario from scratch, or use the pre-build ScanOrders Templates. For this guide, we will be using the FTP template.
1. Login to your Make/Integromat account.
2. Click Templates
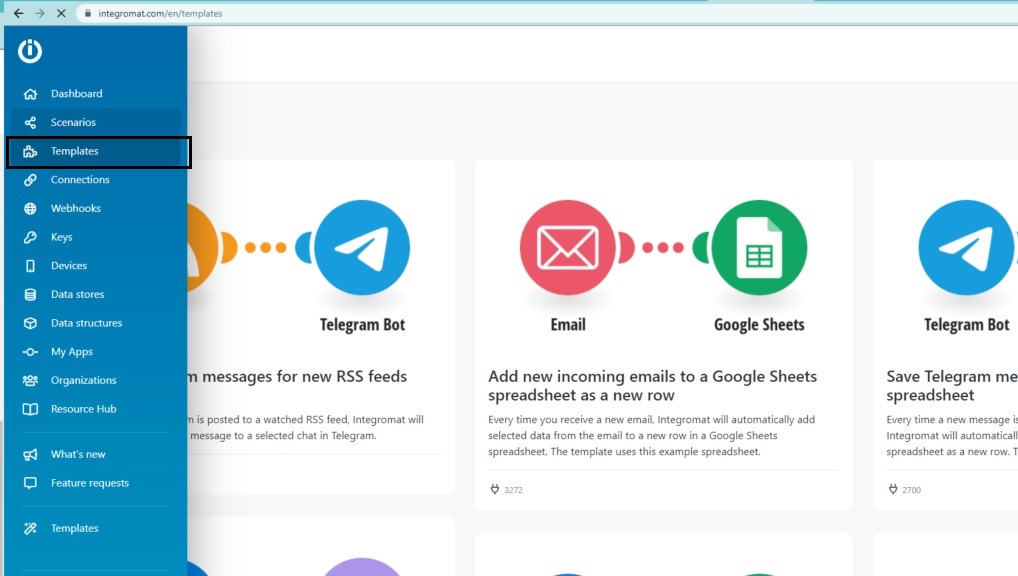
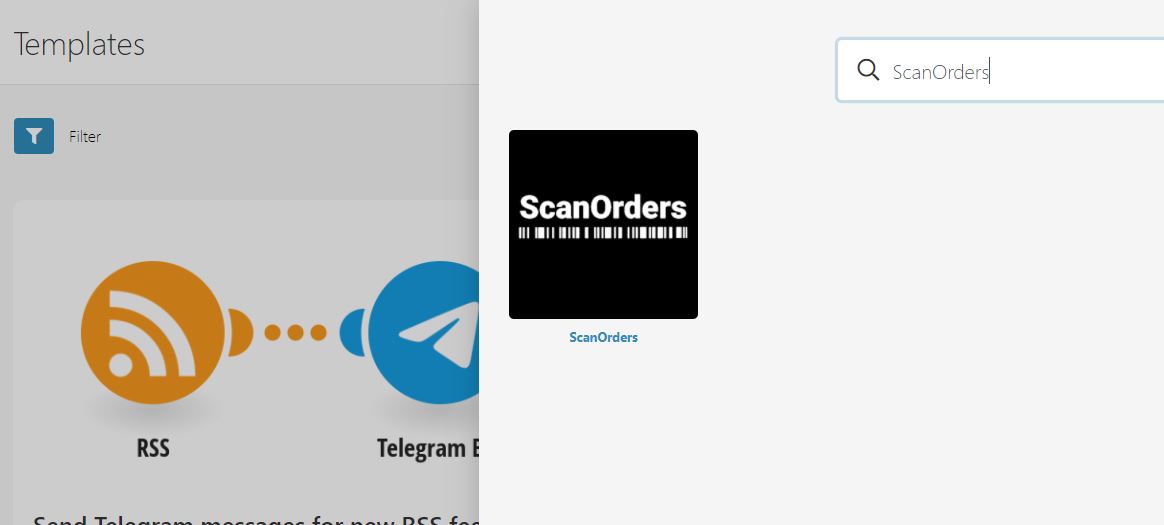
3. Search for ScanOrders, to view all our templates.
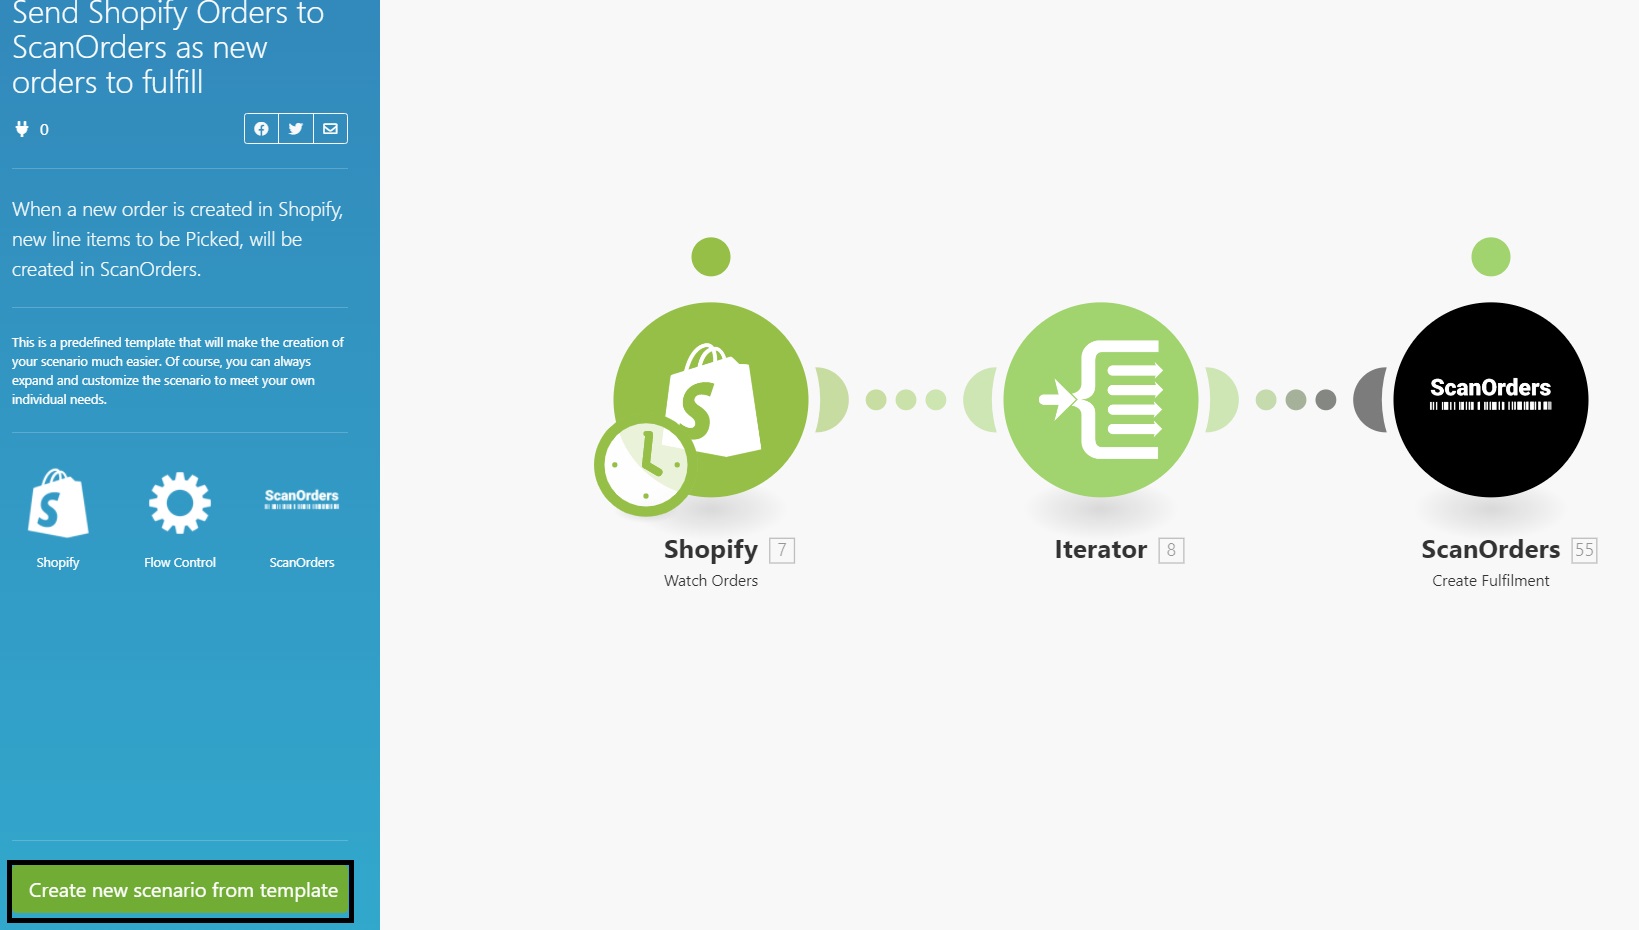
4. Click the one called Send Shopify Orders to ScanOrders as new orders to fulfill
Then click Create new scenario from template
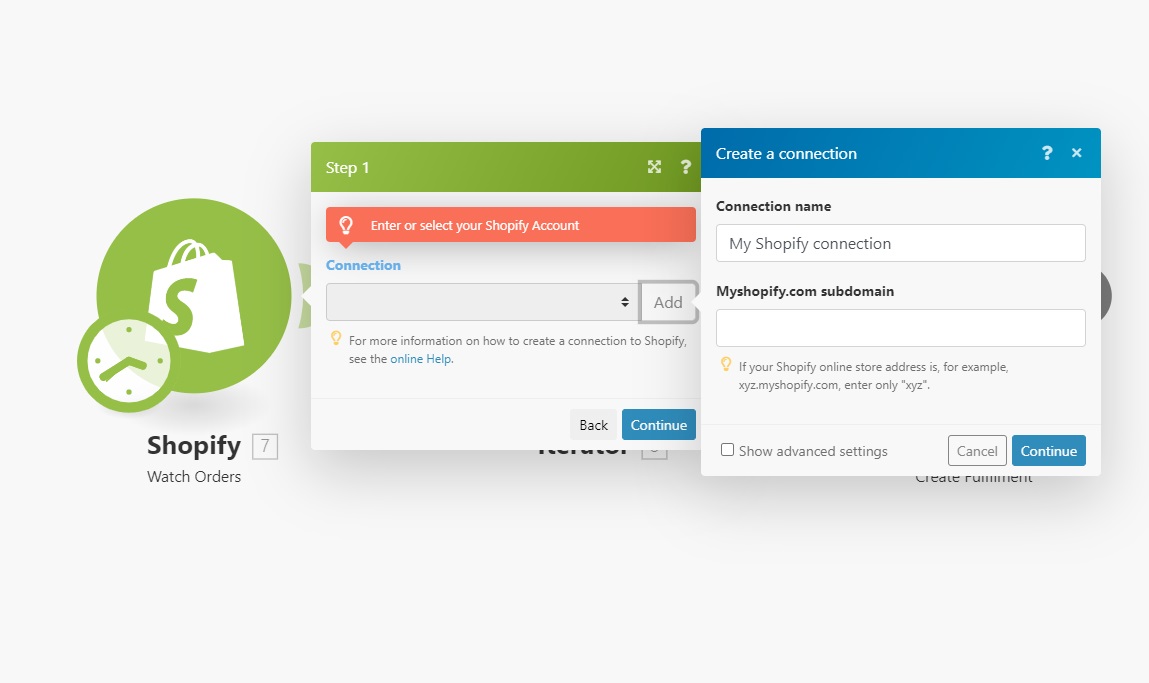
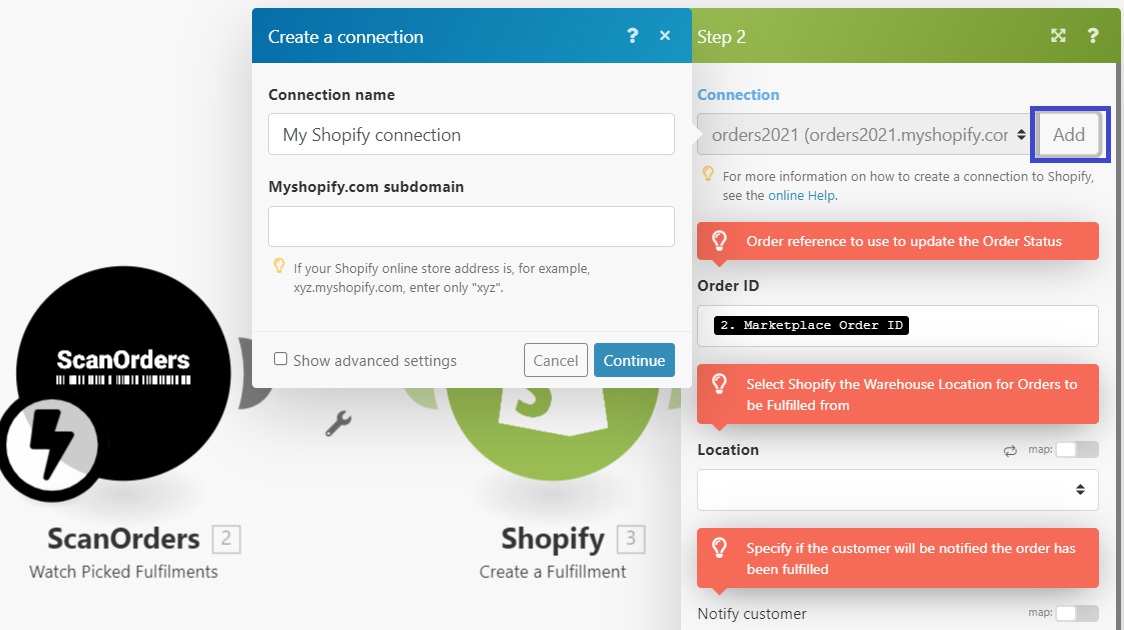
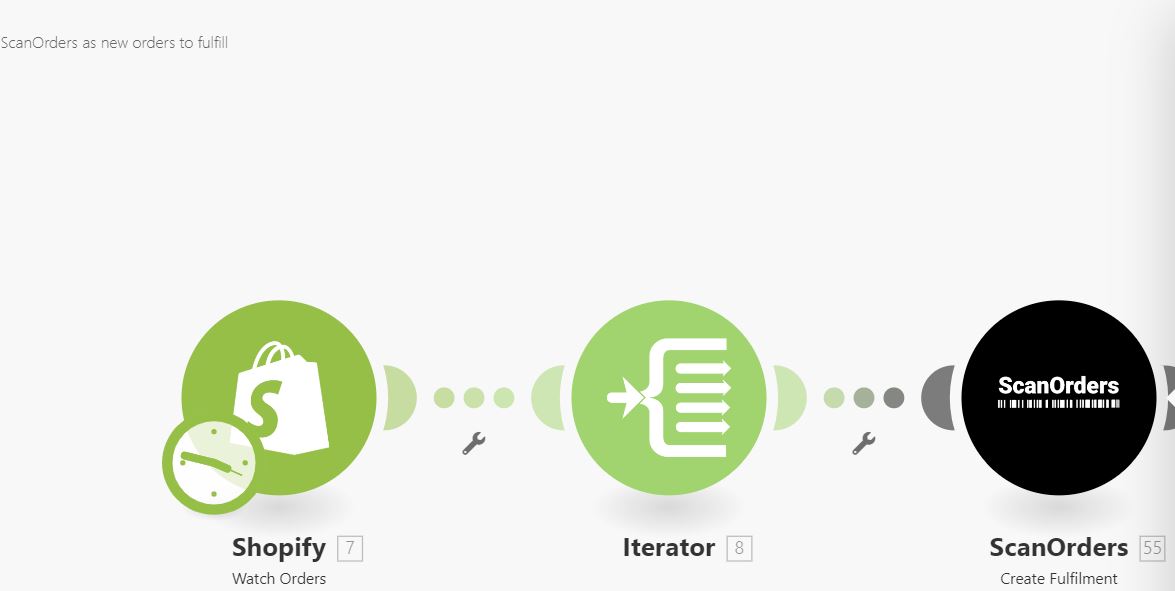
5. In the scenario editor, click on the first module (Shopify). Click the Add button to connect to your store. Enter your store subdomain and click Continue.
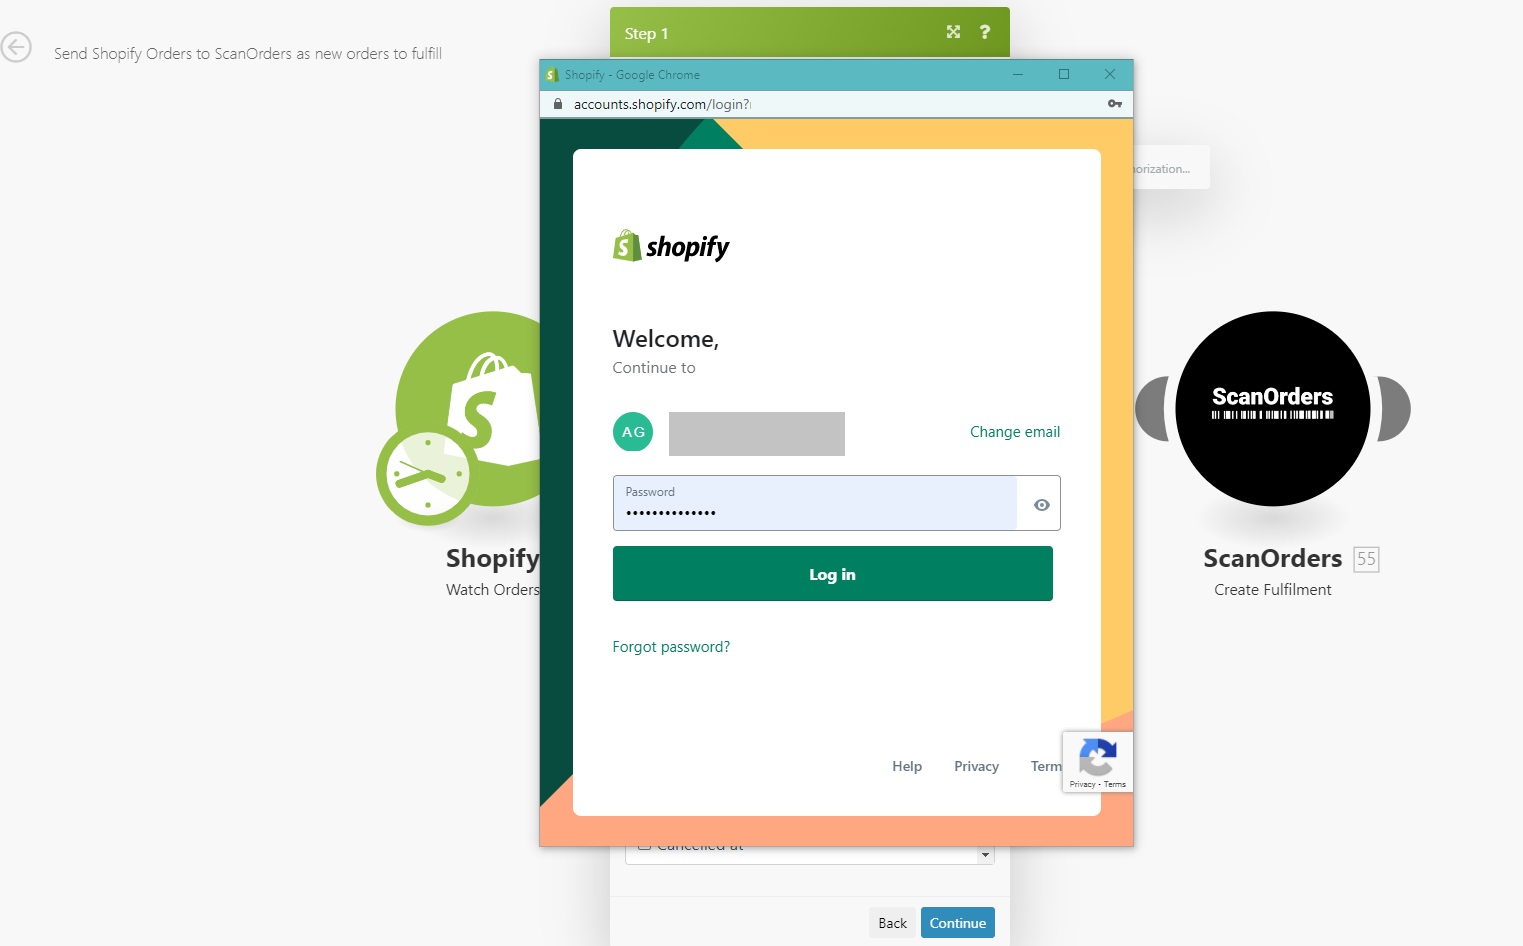
6. The Shopify login screen will popup where you can log into your store. Click Log in
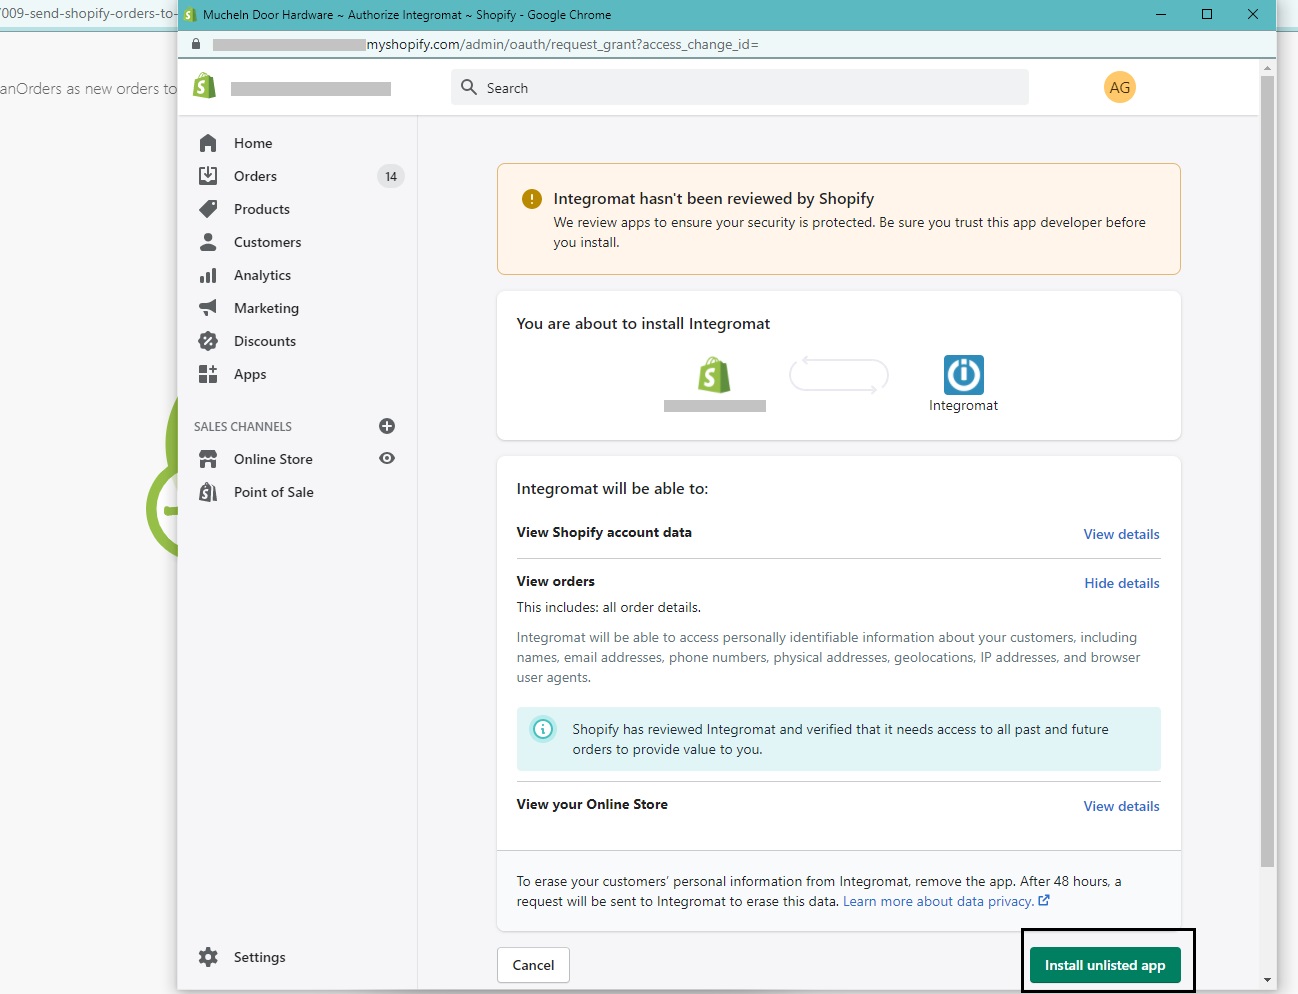
7. Once logged in, Shopify will ask you to install Make/Integromat . Click Install unlisted app. This will close the window and you'll be back in the Make/Integromat editor.
8. There is no more setup required in the Shopify Module. For context the Iterator Module separates out the line items. Shopify will trigger when a new order is added, the iterator will split these new orders out into lines when there are multiple products ordered on the same order.
9. Make/Integromat will move automatically to the ScanOrders Module. Click Add to connect to Scan Orders,
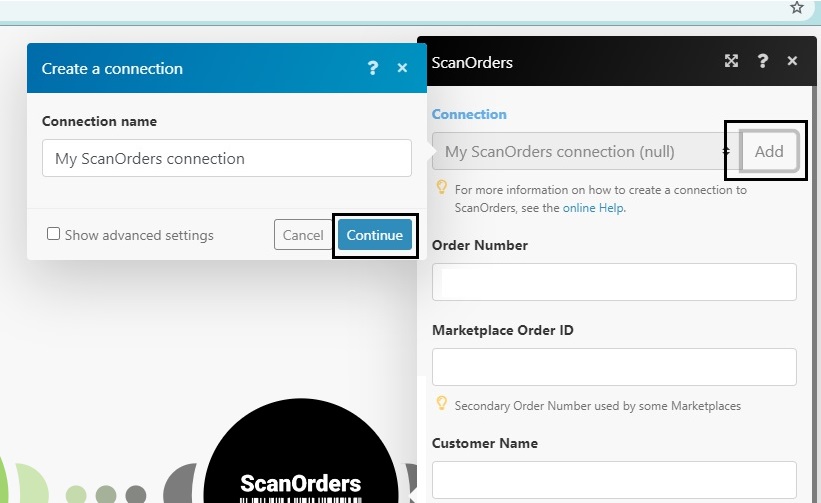
10. Upon clicking Continue you will be taken to the ScanOrders login page. Enter your normal ScanOrders login username and password. Click Log In. This will connect the accounts and the window will close.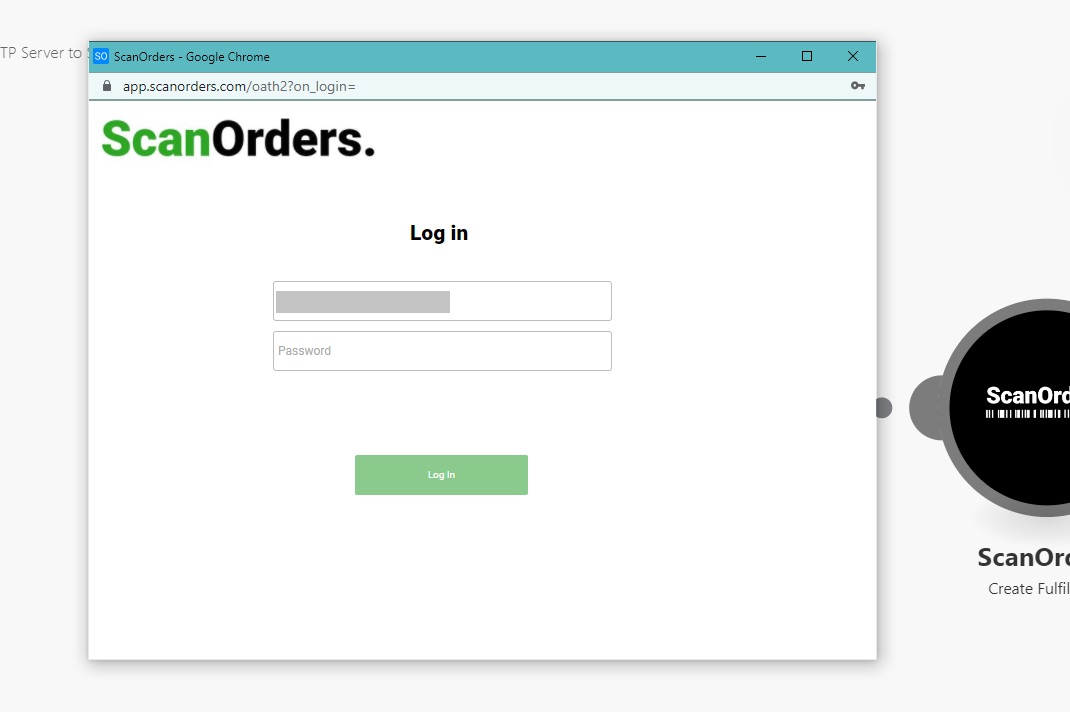
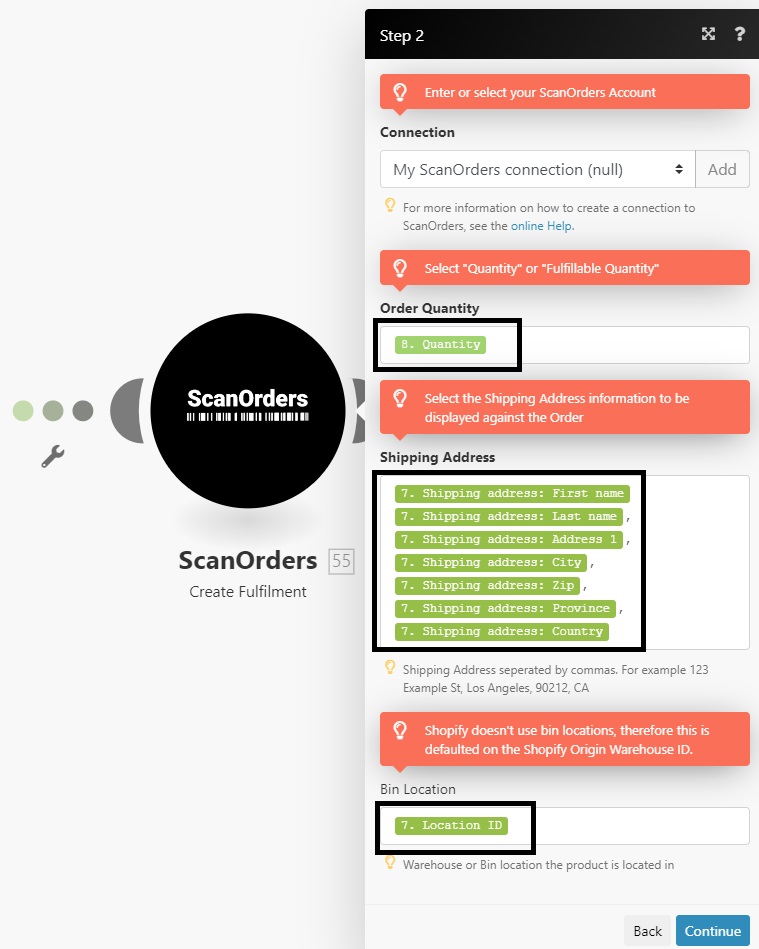
11. The correct Shopify order fields will already be mapped in the ScanOrders Module. You do have the opportunity to change them if required.
To Make changes, click on the input field and the Shopify fields you can insert will pop up.
Order Quantity: If you're fulfilling the same order at multiple locations, you may want to change this to "Fulfillable Quantity".
Shipping Address: This defaults on Customer name, Address, City, Zip, Province and Country. You can drop out fields such as country if not require, or even just include the Customers Name.
Bin Location: Shopify doesn't support bin or warehouse locations. Here you can map this field instead to the location the order is being picked from. This is a Shopify ID number that represents that location. This is important to use if you want ScanOrders to update orders as fulfilled in a separate workflow. Or it can be left blank
OPTIONAL STEP.
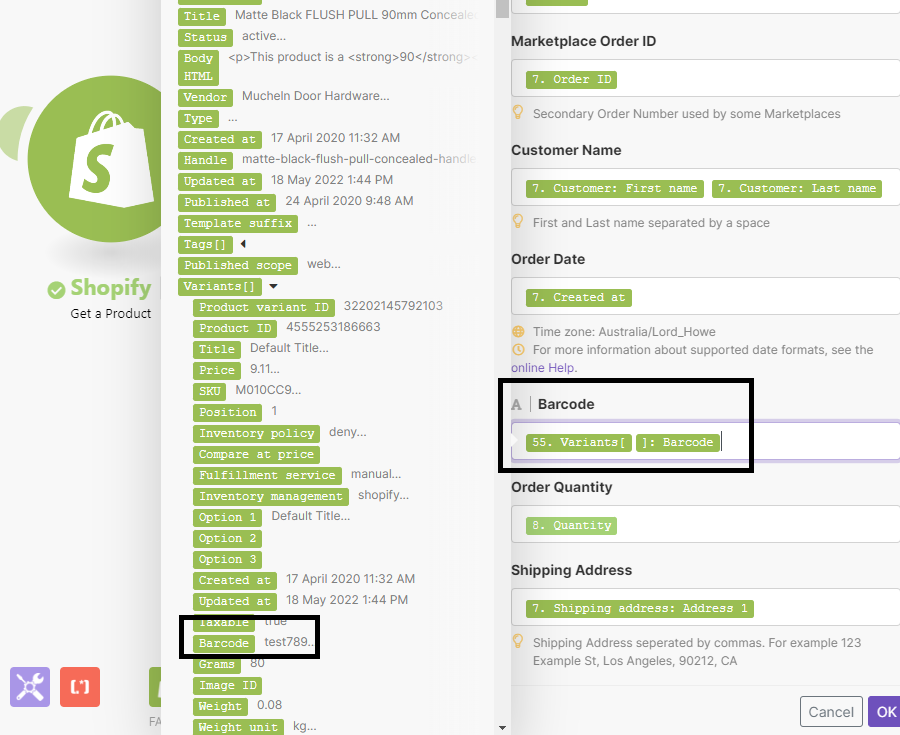
If you wish to use the products' barcode instead of SKU number in ScanOrders, add a Shopify Get a Product Module between the Iterator and the ScanOrders Module. In the Product ID field , find the product ID from the Iterator Module.
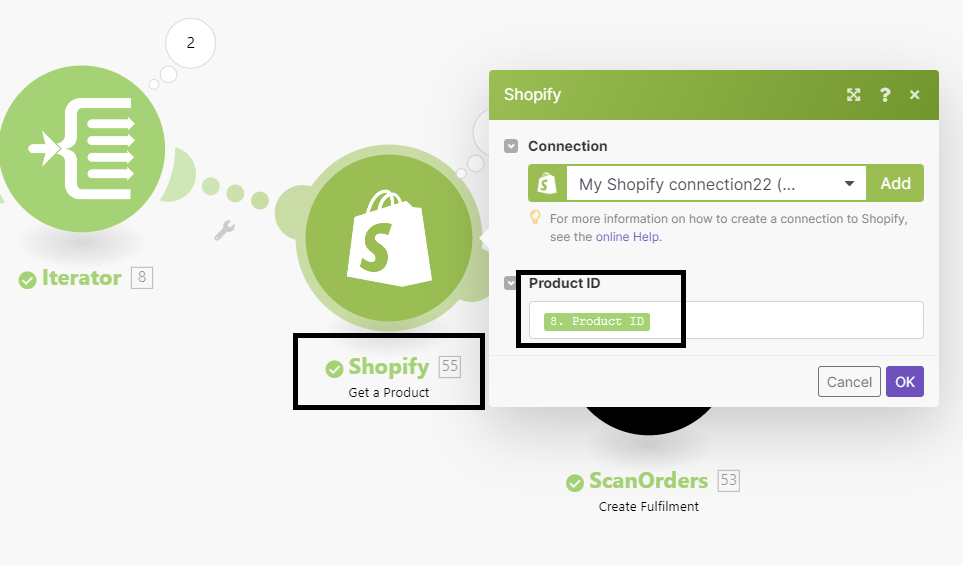
Then in the ScanOrders Module, in the Barcode field, insert the Variants-->Barcode Variable
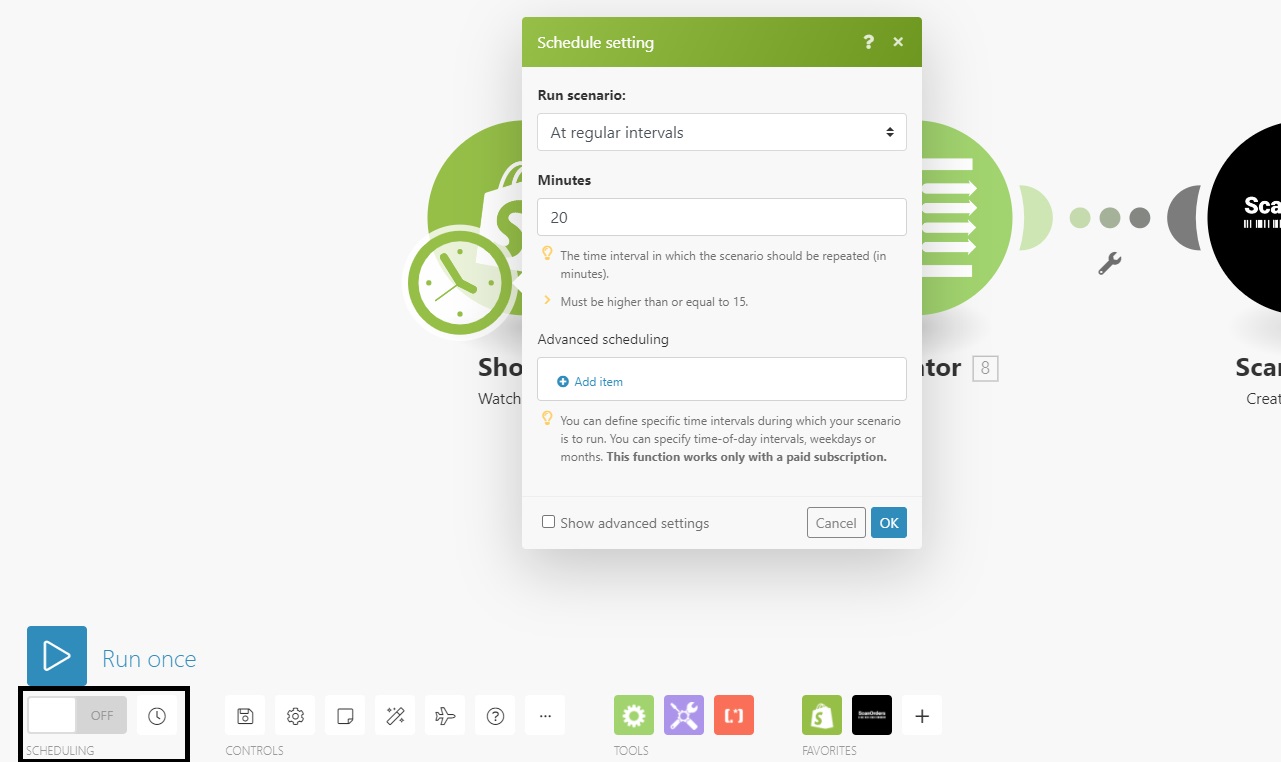
12. When you click Continue, the final step is to ensure you enable the scenario, which activates it. Toggle the Scheduling button to ON
Ensure you also SAVE the scenario, by clicking the save icon.
One enabled, new Shopify orders will flow through to ScanOrders, where they'll be ready to pick
Optional Setting: One setting you may want to change is the frequency Make/Integromat will check for new orders with Shopify. You can change this by clicking the Clock icon attached to the FTP Module and imputing the number of minutes between checks.
Optional Stage 2- Updating order status's in Shopify when the order is packed in ScanOrders
There is an addition optional integration you can set up with Shopify and ScanOrders. Once an order has been completed in ScanOrders, you can then update the status of the order in Shopify to 'ready for pickup' or another status. Many eCommerce stores prefer to update this status via their shipping platform (e.g. Shipstation or Shippo etc.), with the customers tracking information. So, if this is then case, then you would not set up this stage of then integration.
To configure updating of order status's:
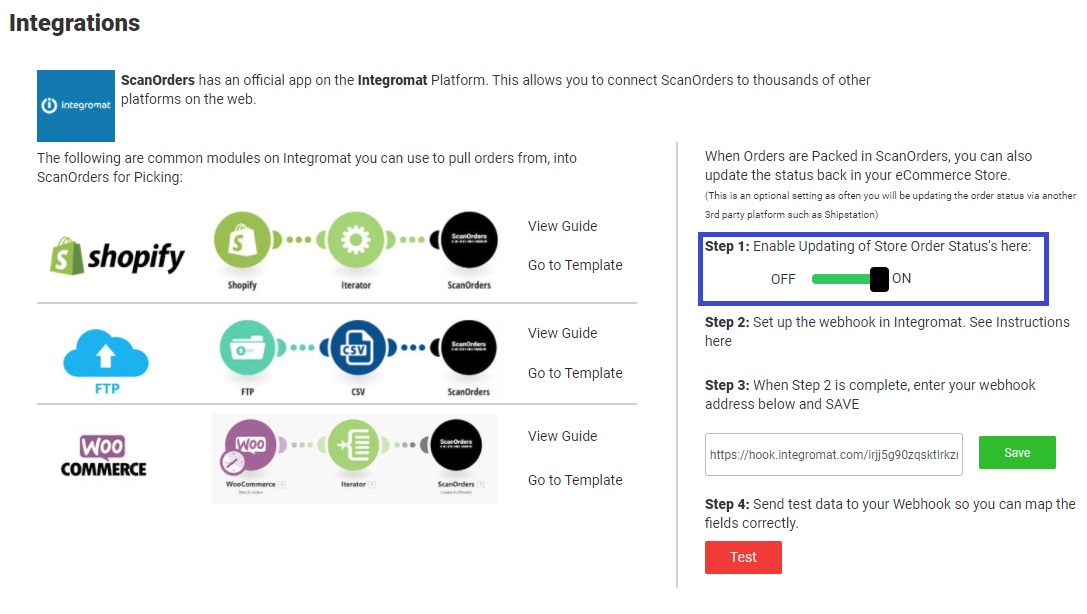
1. Log in to ScanOrders, (https://app.scanorders.com) Navigate to Settings, then Integrations.
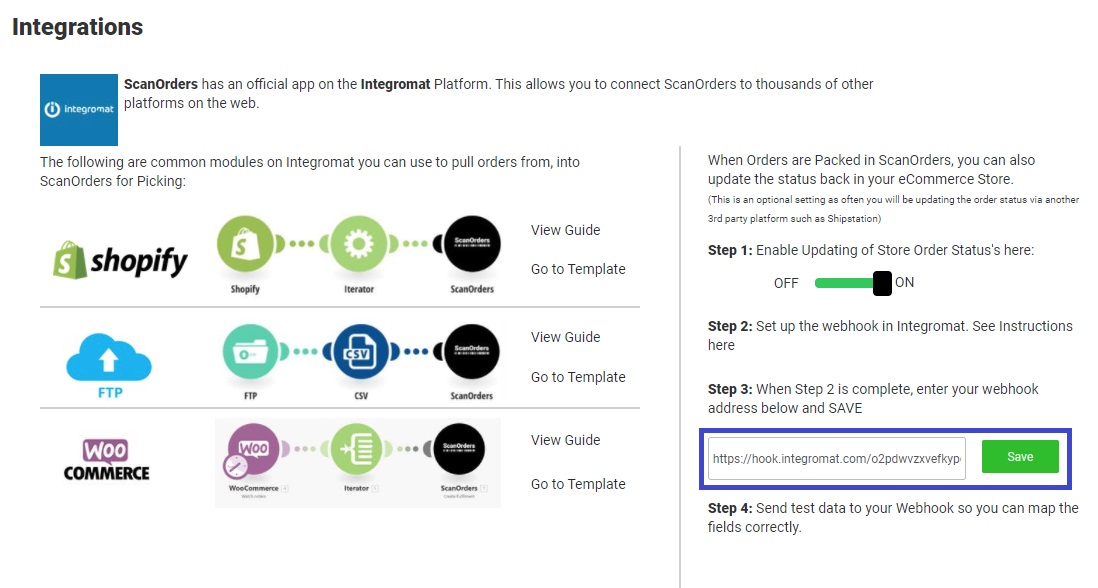
To the right of then Integrations page, you can see the steps for enabling this integration. Firstly, switch the toggle to ON
2. In another tab, Login to your Make/Integromat account.
3. Click Templates
Or view the templates here

4. Search for ScanOrders, to view all our templates.
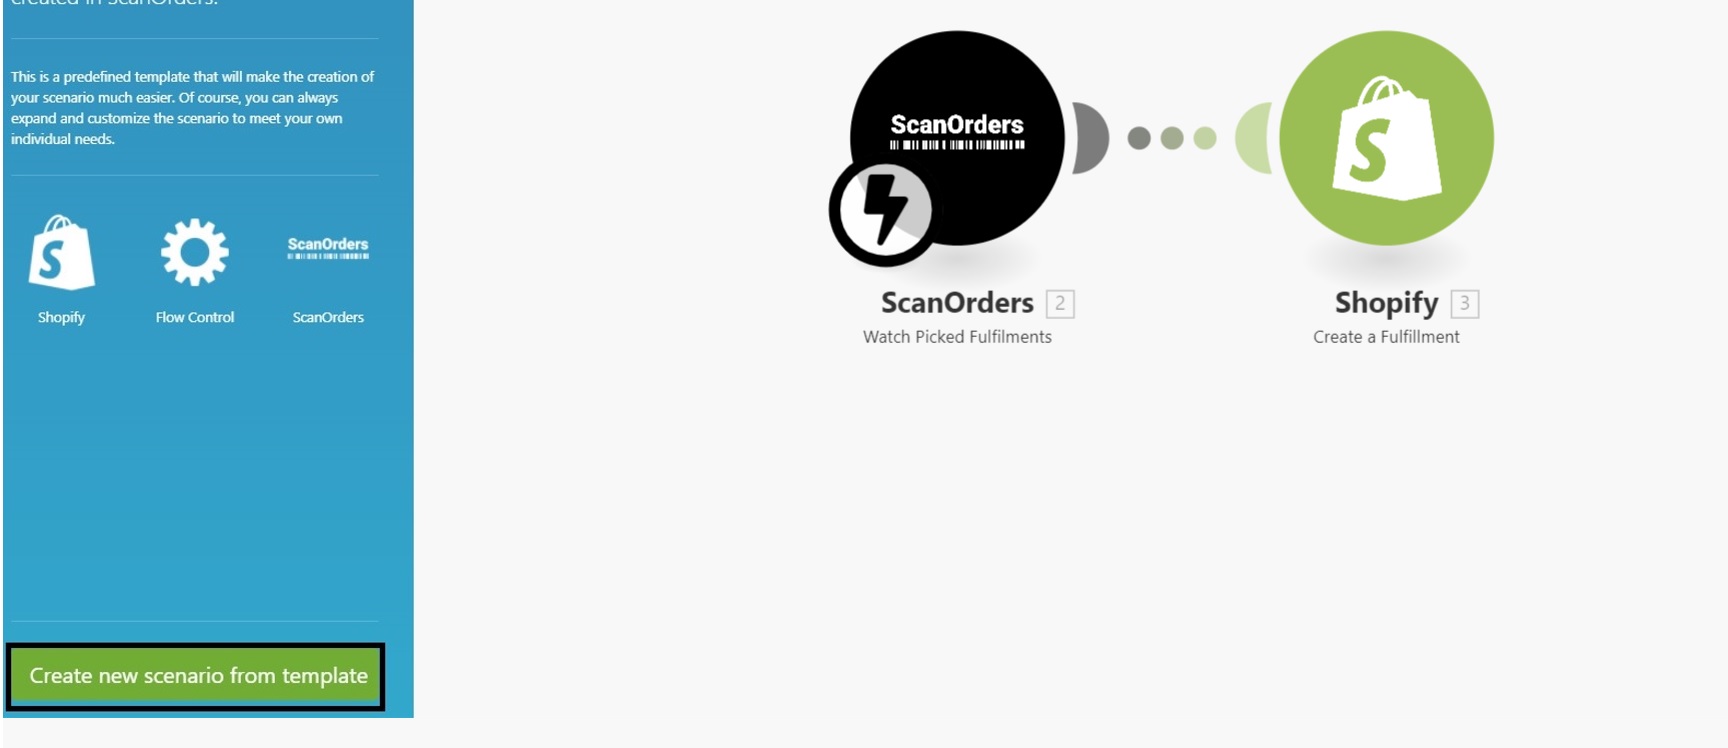
5. Click the one called Update Orders in Shopify as fulfilled when picked in ScanOrders
Then click Create new scenario from template
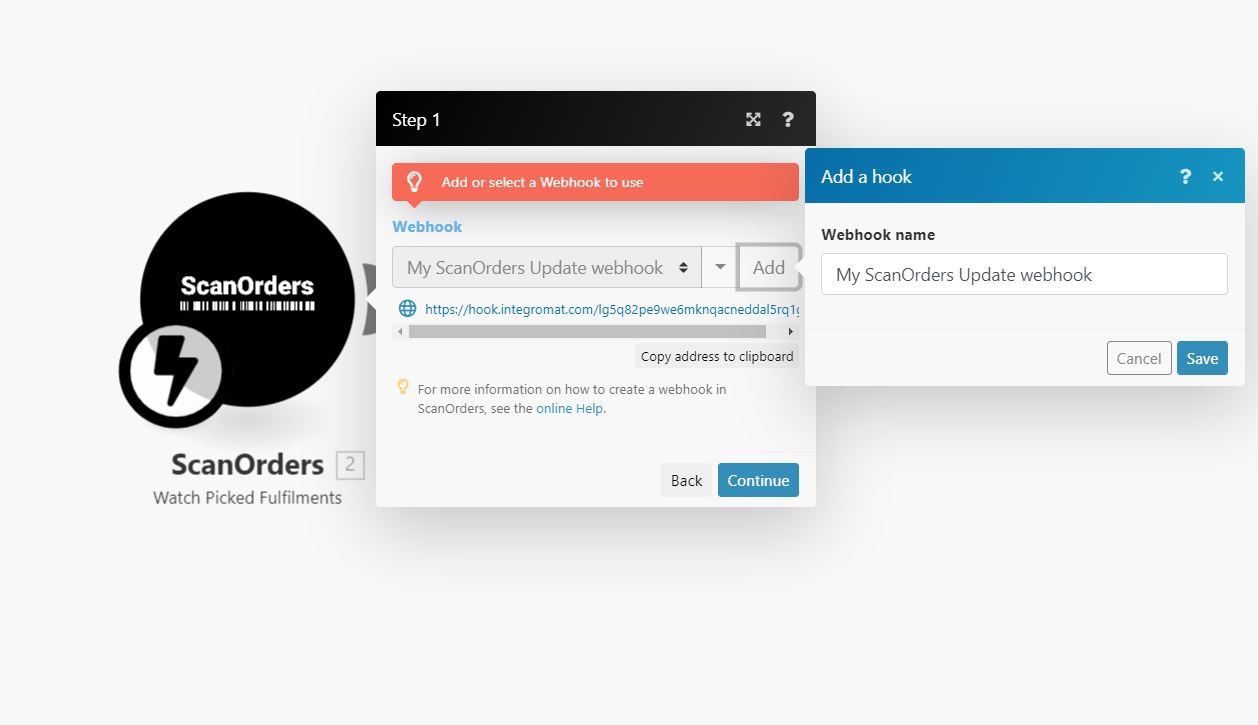
6. In the scenario editor, click on the first module (ScanOrders). Click the Add button to generate a webhook, then click SAVE.
7. This will generate an address. Copy this by clicking Copy address to clipboard
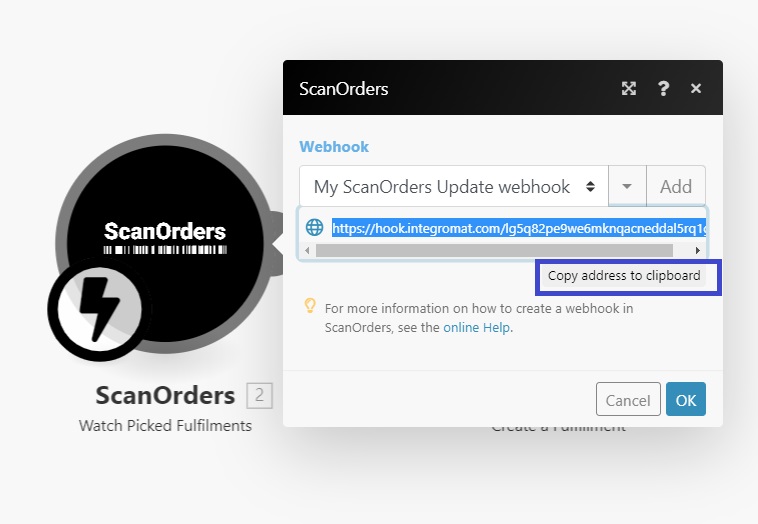
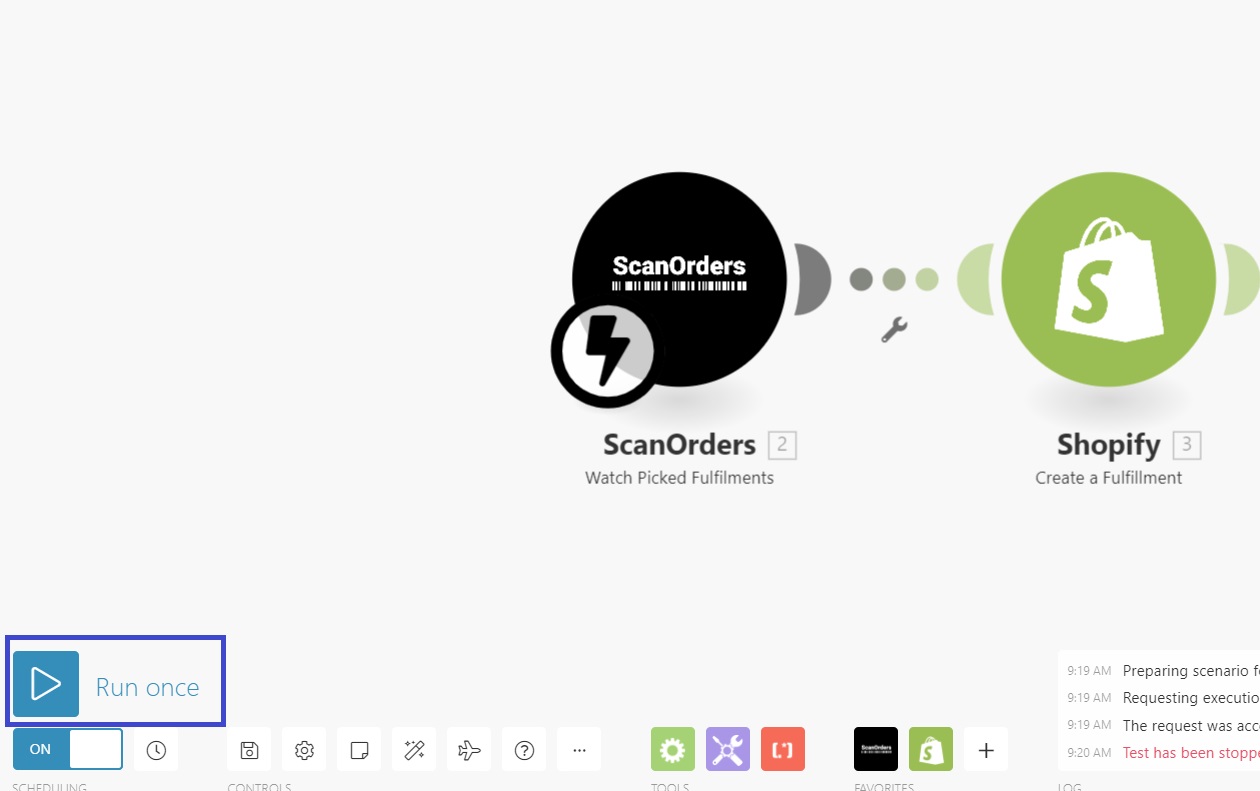
8. Click OK. In the bottom left of the screen click the Run Once button to set up a test connection
(Before this, Make/Integromat may automatically move to then next module to set up, if it does, enter anything in the Order ID field and select a Location from the dropdown, and click OK to close this module)
9. Back in your ScanOrders dashboard, enter the address you copied into the Step 3 box on then Integrations page. Click Save
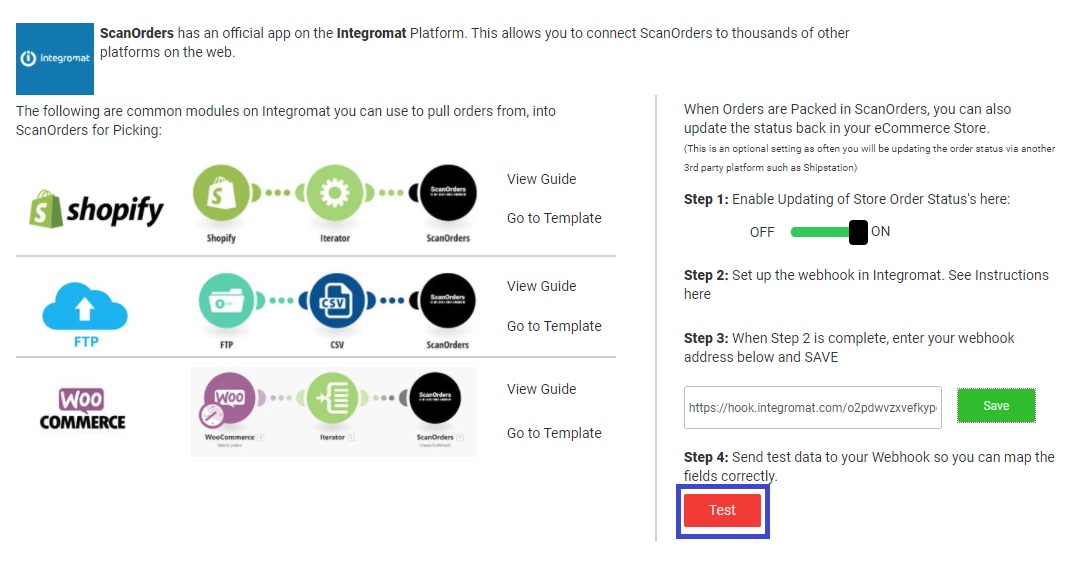
10. A Test button will now appear. Click this button. This will send some test data to your Make/Integromat Scenario to help with mapping order numbers.
11. Navigate back to the Make/Integromat Scenario. Now you need to connect to your Shopify account. If you've already connected to Shopify in the earlier steps in this guide, you can select that connection from the drop down. Otherwise click Add and follow steps 6 and 7 in the first section of this guide.
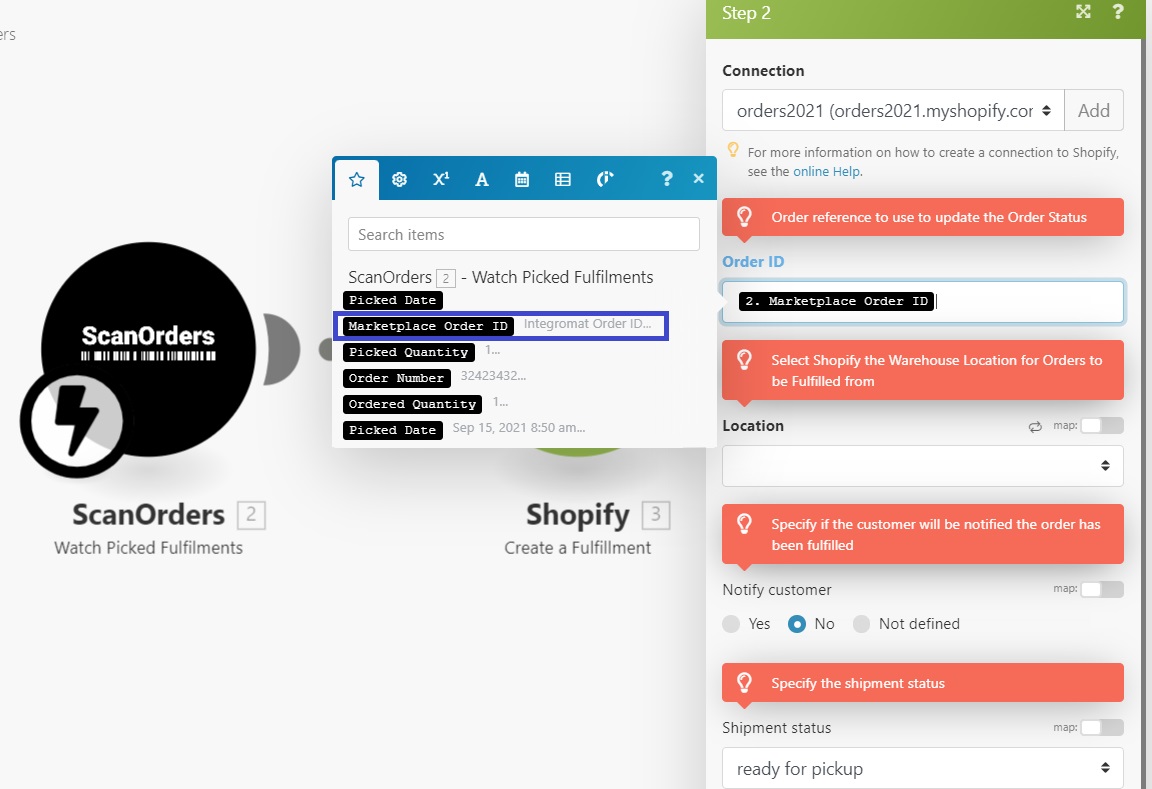
12. Click in the Order ID field. This is where you'll map your order ID from ScanOrders. In the options you can select from on the popup on the left, select Marketplace Order ID Make/Integromat Order ID. Be careful this is the one you select, as there may be others with similar names.
13. In the location field, select the location you are packing the orders from, in the drop down. These location(s) are pulled from your Shopify account 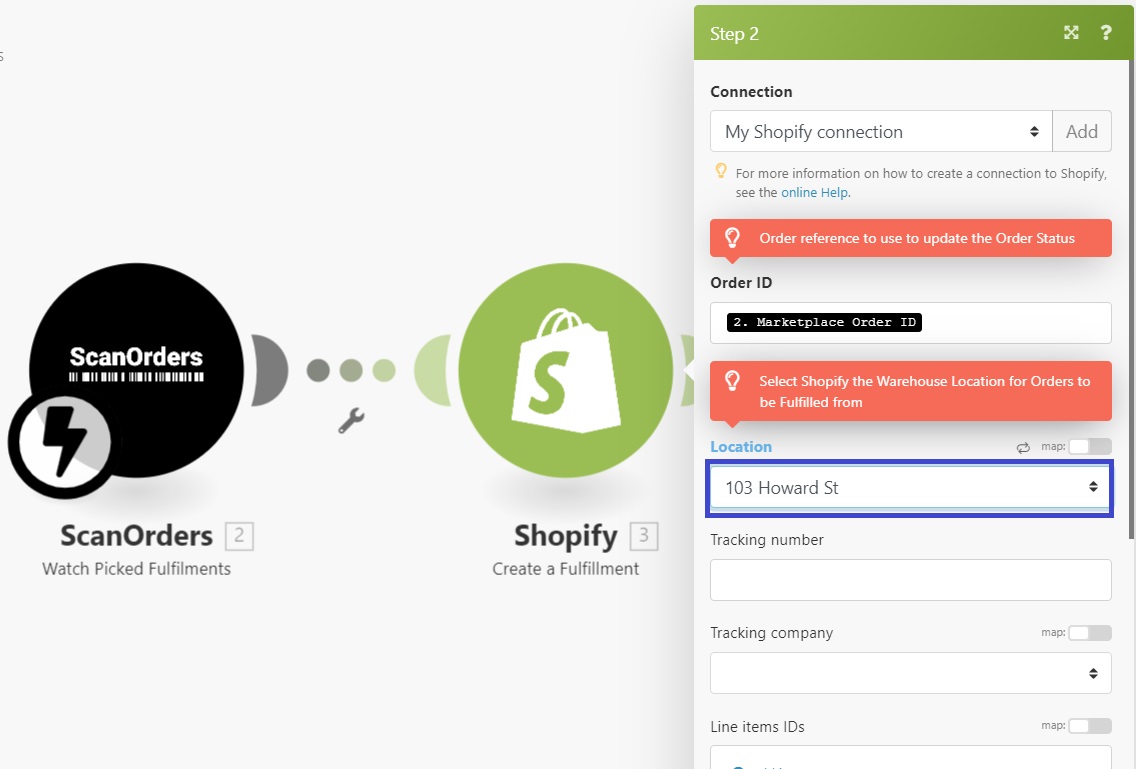
14. There are 2 other fields to configure.
- You can select whether the customer is notified with the status update, this is defaulted on No
- You can select which status the order is updated to. Normally this would be 'ready for pickup'. However, depending on your preferences you can change this to another status such as 'confirmed' or 'intransit'.
Once configures click Continue.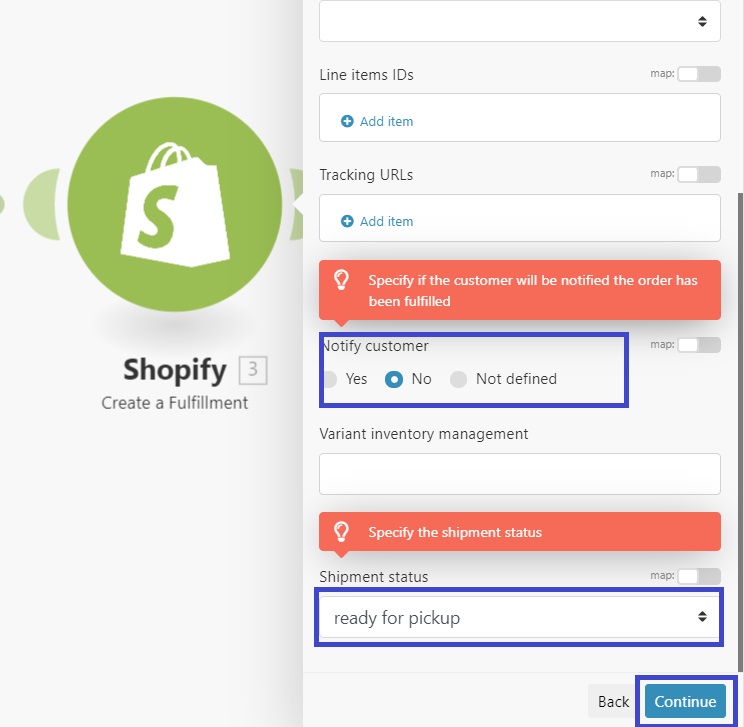
15. Finally, SAVE the scenario by clicking the save icon, then enable the scenario by toggling the switch to On. 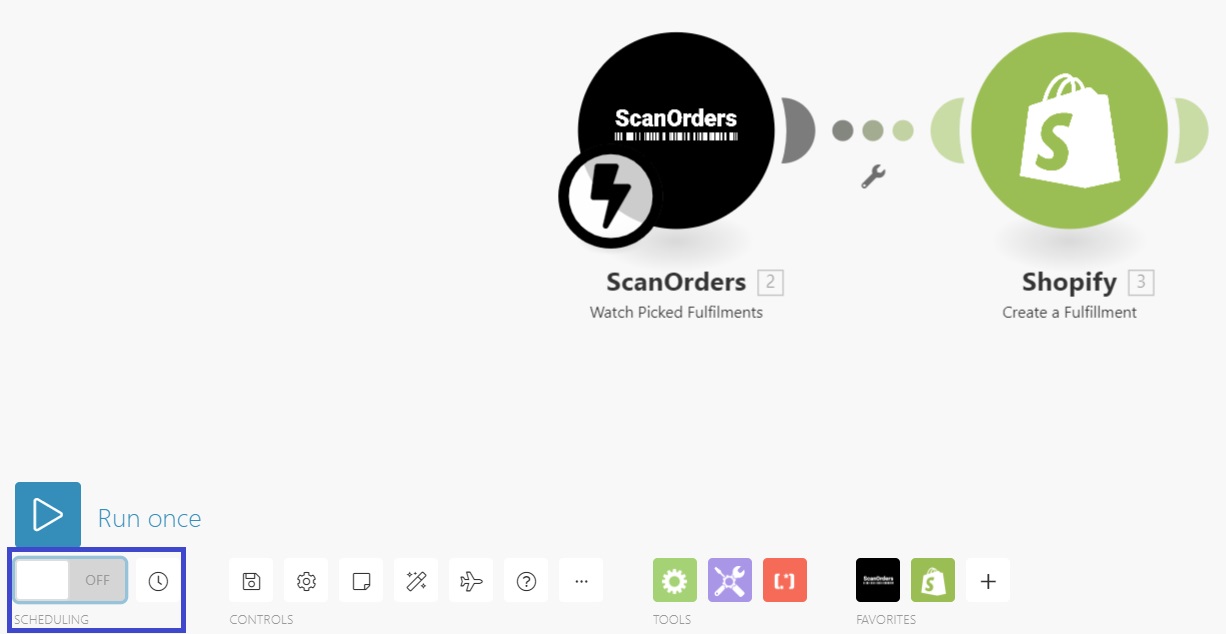

Comments
0 comments
Article is closed for comments.